- How to start
- Website builder
- Home
- Sections
- Components
- How to add your Courses to your page
- My Courses
- Course Sales Page
- Thank you Page
- Privacy Policy
- Cookies
How to start
You can access a website builder from your main menu in dashboard: Dashboard > My Website.
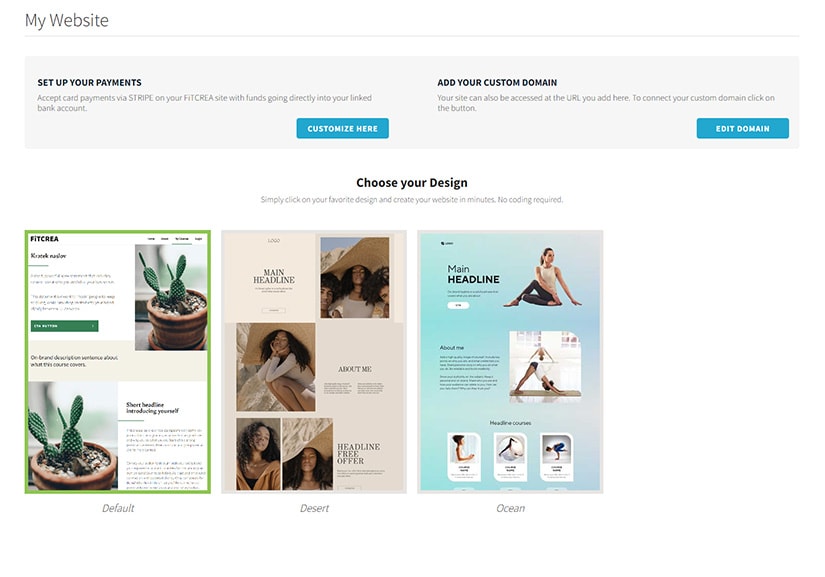
To create your website go to:
- My website
- Choose a design – Select the design template you want to use. If you wish to change the template later on, first save all your copy, images, and colors, as your own content won’t be transferred to a new template.
- Customize the design
- Save and publish the design
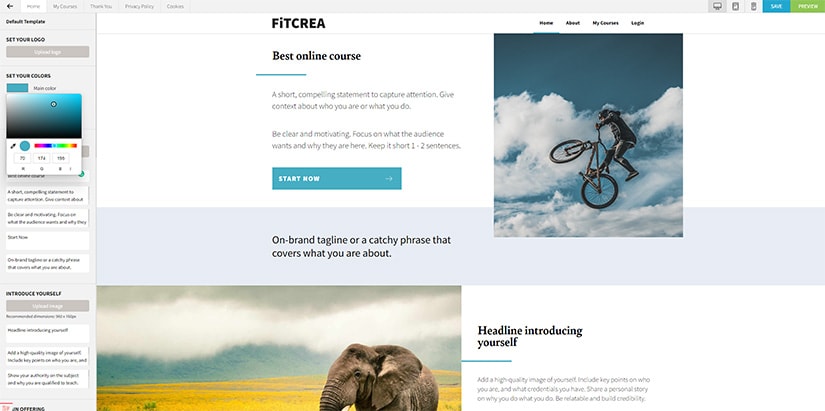
Your website is automatically published to yoursitename.fitcrea.com. If you wish to change the URL then you need to change the domain. You can read more on how to change the domain here.
You can sell your courses directly from your website if you are on a paid plan and if you have connected your Stripe account. You can read more on how to connect Stripe here.
If you are on a free plan, don’t worry. You can still show and sell your courses, but instead of adding Buy Now buttons add the Contact me button and get an email every time someone wishes to buy your course. Then add them as new users in the dashboard. To learn more on how to add new users click here.
Website Builder
In website builder you can customize the next websites:
Home
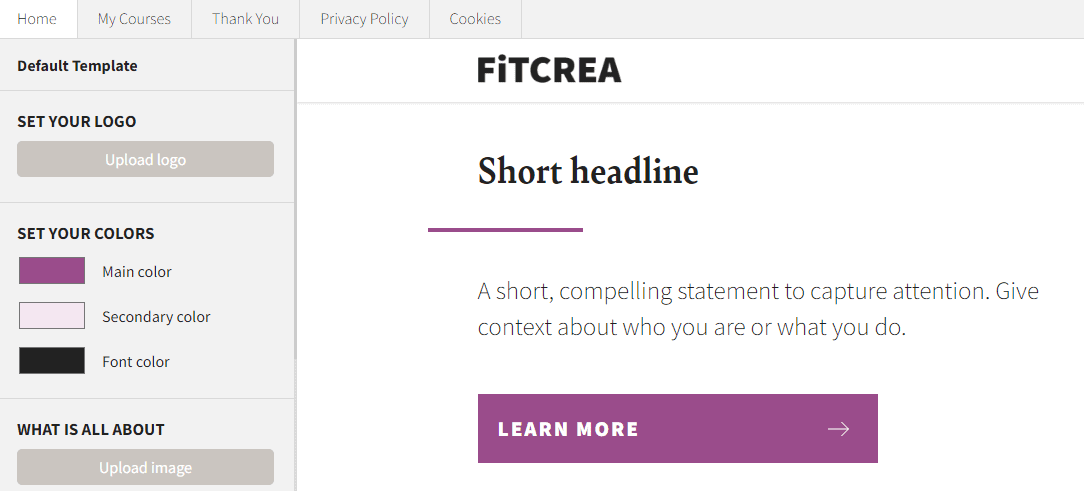
Set your logo
Your brand logo will be displayed at the top left of every page. Your logo also serves as a link to Home.
Set your brand colors
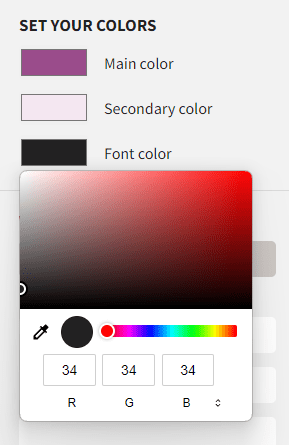
You can customize the next colors:
- Main color – is used for all CTA buttons and backgrounds.
- Secondary color – is used for text background.
- Font color – is used for text colors and headlines.
Sections
Your page is built with sections. All your copy, images and call-to-action buttons are placed in the sections.
The number of sections and their order is different for each design template. Before choosing a template find the one that has the best structure for you. You can not rearrange the sections, but you can leave them empty and they won’t appear on your website.
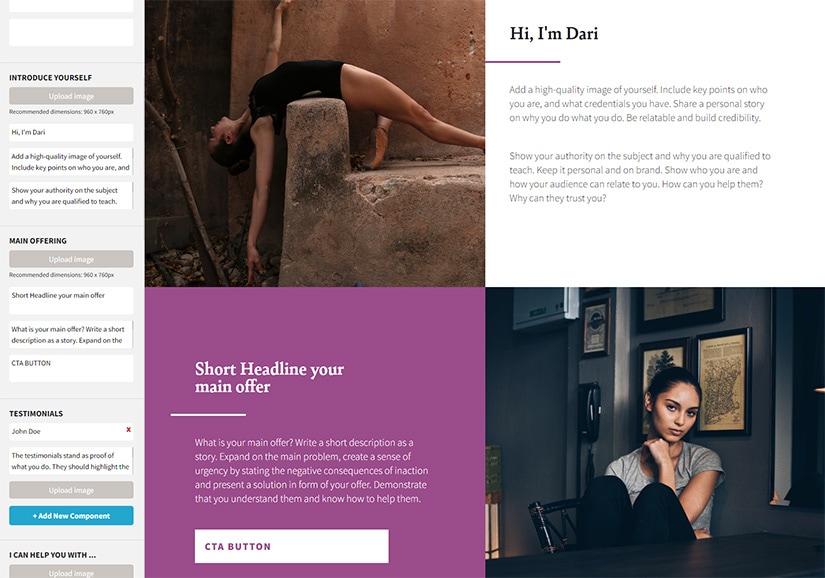
Components
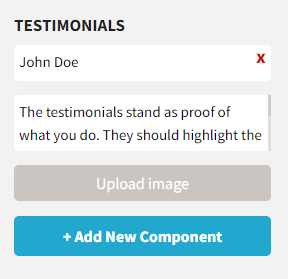
In each section you can change the headline, text and upload your own image. Button Add new component adds another block of text, testimonial or more content.
How to add your Courses to your page
Select your courses is a dinamic section where you can select from published courses in your app and showcase them on your website. If there are no courses published yet you will be prompted to create a new course.
To add more than one course on the homepage go to the dropdown menu Select your Courses. When you select a course in the dropdown, a new section with the selected course will appear. You can edit this section. If you wish to add another course go to the dropdown menu again and select another course. If you wish to remove a course from the homepage, click on the red cross on the right of the course name in a website builder.
My Courses
This is where all your courses are listed. There is a CTA button for each course that leads to the course’s unique sales page. You can not change this page as it is a dynamic page and lists all your published courses automatically.
Course Sales Page
This is the sales page where users can learn more about your course. The main purpose of the sales page is to convert visitors to buyers.
Your page is built with sections. All your copy, images and call-to-action buttons are placed in the sections.
The number of sections and their order is different for each design template. Before choosing a template find the one that has the best structure for you. You can not rearrange the sections, but you can leave them empty and they won’t appear on your website.
In each section you can change the headline, text and upload your own image. Button Add new Component adds another block of text, testimonial or more content.
Countdown
The countdown allows you to set the date when this course/special offer is acailable. Set the date by clicking on the calander icon or write the date manually. If the counter is emty/is not set, it will not appear on the site.
Intro videos
Intro video allows you to add a video about your course.
Course modules description
Section Course modules is a dynamic section, where you can add description for each module in the course.
Thank you page
Thank you page is displayed once someone purchaces your course. After completed checkout your new user is directed to the Thank you page. Here you can give instructions on how they can access their course.
Privacy Policy
Add your Privacy Policy for your sitename.fitcrea.com. There is a generated template available. Make sure you read through it and customize for your business.
Cookies
Add Your Cookies policy to your sitename.fitcrea.com. There is a generated template available. Make sure you read through it and customize for your business.

 Začni zdaj